Arduino-Temperatur-Sensor
English short – text:
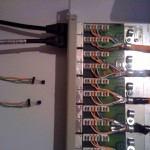
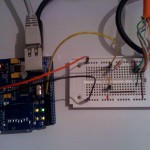
Here are some pictures of my Arduino-Temperature-Sensor.
The three DS 18B20 temperature sensors are connected via ethernet cable to a patch panel and then connected to the Arduino using a small breadboard.
The orange cable from the patch panel goes to a socket on the breadboard (upper right).
On the Arduino, there is a small sketch running, which gets the values from the sensors and offers them to the ethernet vie telnet (TCP, 23).
This setup has a problem with long cable length – the DS18B20 stop corresponding with the Arduino – all of them, not only the one far away! You find a patch for the library below to fix this problem.
Hier Bilder von meinem Arduino-Temperatur-Sensor.
Die drei DS 18B20 – Temperatur-Sensoren sind über Ethernet-Kabel über ein Patchfeld
und ein Breadboard an den Arduino angeschlossen. Das Kabel vom Patchfeld geht dabei auf eine Sockelleiste, welche auf dem Breadboard steckt (rechts oben)
Dort läuft ein kleines Programm, welches die Werte ausliest und per Telnet-Server im Netzwerk zur Verfügung stellt.
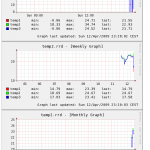
Auf meiner Synology DS 207+ läuft ein Perl-Programm als minütlicher Cron-Job, der den Arduino abfragt und die Werte in eine RRD-Datenbank schreibt. Ein andere Cron-Job erzeugt die PNGs, die dann per Web abrufbar sind:
On my Synlogy DS 207+ Diskstation, there runs a perl script every minute and collects the values from the arduino and stores them in a RRD-Database.
Die “0-Grad”-Werte kommen vom Umbau des Boards, um es Photo tauglich zu machen – da haben die Sensoren zeitweise mal keine Daten geliefert…
Es gab ein Problem mit langen Leitungen: als ich die Sensoren im Haus verteilt habe und damit Kabellängen bis zu 50 Meter erzeugt habe, blieb die Kommunikation stecken. Das Problem war im Prinzip auch einfach zu lösen: die OneWire-Lib hatte ein Timingproblem. Einige der Spezifikationen wurden am Rand der Werte betrieben, was bei langen Kabeln zu einem Problem mit der Kommunikation führt. Ich habe die Werte etwas angepasst und dann ging es.
Hier mein Patch für OneWire.cpp:
--- OneWire_orig.cpp    2008-05-20 02:10:54.000000000 +0200
+++ OneWire.cpp 2009-04-14 19:30:58.000000000 +0200
@@ -115,8 +115,8 @@
 // more certain timing.
 //
 void OneWire::write_bit(uint8_t v) {
-    static uint8_t lowTime[] = { 55, 5 };
-    static uint8_t highTime[] = { 5, 55};
+    static uint8_t lowTime[] = { 60, 8 };
+    static uint8_t highTime[] = { 8, 60};

     v = (v&1);
     *modeReg |= bitmask;  // make pin an output, do first since we
@@ -137,7 +137,7 @@

     *modeReg |= bitmask;    // make pin an output, do first since we expect to be at 1
     *outputReg &= ~bitmask; // zero
-    delayMicroseconds(1);
+    delayMicroseconds(3);
     *modeReg &= ~bitmask;     // let pin float, pull up will raise
     delayMicroseconds(5);          // A "read slot" is when 1mcs > t > 2mcs
     r = ( *inputReg & bitmask) ? 1 : 0; // check the bit
Auf Anfrage hier der Code, um die RRD-Graphen zu bauen:
/etc/crontab:
*      *       *       *       *       root    /volume1/web/rrd/get_temp.pl
*/10   *       *       *       *       root    /volume1/web/rrd/make_pictures.pl
get_temp.pl
#!/opt/bin/perl
use RRD::Simple;
use strict;

my $rrd_file="/opt/var/lib/rrd/temp2.rrd";

# Create an interface object
my $rrd = RRD::Simple->new(
 file => $rrd_file,
 cf => [qw(LAST AVERAGE MIN MAX)],
 );

if (! -f $rrd_file ) {
$rrd->create(
 temp1 => "GAUGE",
 temp2 => "GAUGE",
 temp3 => "GAUGE",
 );
}

open my $in, "wget -q   -O - 192.168.178.222:23|" or die;

my @temp;
while(<$in>){
 my ($dummy,$num,$ist) = split(/\t/);
 push @temp,$ist;
}

$rrd->update(
 temp1 => $temp[0],
 temp2 => $temp[1],
 temp3 => $temp[2],
);
Make_pictures.pl:
#!/opt/bin/perl
use RRD::Simple;
use strict;

my $rrd_file="/opt/var/lib/rrd/temp2.rrd";

# Create an interface object
my $rrd = RRD::Simple->new(
 file => $rrd_file,
 );

$rrd->graph(
 destination => "/volume1/web/rrd/",
 source_labels => [ "Temp1","Temp2","Temp3"],
 extended_legend => 1,
);

